Tips That Will Amaze You

Another entry in possibly the most simplistic life hack series ever.

How to warm up a wrap/tortilla

Couldn’t be easier, right? Put a paper towel over it, put it in the microwave for a few seconds? Well, the drawbacks are that it either dirties a plate, or uses up a couple of paper towels, often ends up a little soggy and too soft. I’ve even tried putting a tortilla on a warm electric burner on the stove. Uh, don’t do that — you’ll have to scrape tortilla off later. Sure, you can put them in the oven, or grease a frying pan to warm them up in, but I just wanted a really simple way — and I found it!

I was adapting a recipe I got from American’s Test Kitchen for Chorizo and Potato Tacos (here’s the original – https://www.americastestkitchen.com/recipes/10250-chorizo-and-potato-tacos). If anyone wants to know how I adapted the recipe, add a comment on this post and I’ll write it out. Anyway, I had a frying pan with chorizo sausage and cubed potatoes that was just heating up and almost ready to eat, and I had a large round burrito wrap I was planning to roll it up in. So I just laid the wrap on top of the mixture in the pan and put a lid on it and let it warm up with the filling! It was absolutely perfect.

Yup, that’s it. Lay your tortilla on top of the pan with the hot filling and put a lid on. Simple, but it works. And once again I never thought of this before!

Fixing a Blah Soup

After making a soup that definitely didn’t knock my socks off, I went searching the internet for ideas on how to improve it. There are tons of suggestions out there, although an awful lot of them seemed like “here’s an idea” rather than “this is what really worked”, so I thought I would just post a quick one of the latter.

Yesterday I made soup in a crockpot, sauteeing onions and garlic and browning ground beef first. With those in the crockpot, I added celery, carrots, mushrooms, kale, zucchini and a can of diced tomatoes. Then I used beef bouillon and water, salt and pepper and some Tuscan seasoning blend I had. Toward the end of cooking I added some egg noodles.

What was wrong with it? It was bland. Needed more salt, but that wasn’t enough to redeem it. It looked gross, frankly. Watery, but dark from the dark veggies, plus kind of mushy. Just didn’t work. I would definitely skip the zucchini in future. Although the mushrooms — they were Crimini mushrooms — had a nice chewiness to them which was a plus.

Flour – Butter – Bouillon in hot water – Lemon juice – Hot sauce – Grated Parmesan cheese

So to fix it, here’s what I did: mixed some flour with butter to make a roux and cooked this in a saucepan until it just barely started to turn brown. Then I dissolved beef bouillon paste – not very much, probably less than a teaspoon – in a cup of hot water.  Adding the water a little at a time to the pan while stirring over medium to medium-low heat, I continued to add liquid until it was no longer thick.

I added the leftover soup to this and heated it up to a simmer. When I tasted it, it was better but still lacking something so I gave it a splash of lemon juice and served it up. In the bowl I added a shot of hot sauce and topped it with grated Parmesan. It turned out beautifully! Instead of a watery broth, it had a nice smooth broth with some body, and the flavor was much much better.

Food Experiments: One Pot Pasta Part II

As a follow-up to my last Food Experiment post, I offer a better pasta in one pan quickie lunch. This requires a prepared sauce, but adds some veggies, and I think it comes out much better than my previous one – here.

Not only do you only use one pan, it all cooks together once you get it started. No draining–once the pasta is done, the whole dish is done. Perfect!

For one serving, I used:

  • Penne pasta, about 3/4 cup dry
  • Classico Florentine Spinach & Cheese Pasta Sauce, 3/4 to 1 cup
  • Quarter of an Onion, diced small
  • Half a small Summer Squash, diced
  • 2 Tablespoons canned Black Beans
  • Fresh Basil, sliced up small
  • Olive Oil, salt and pepper, grated cheese
  • a splash of water

Heat a quart sized sauce pan to medium, add enough oil to saute veggies. Throw in the onion and let it saute a couple minutes, then add the squash. Give that another couple minutes, stirring to prevent too much browning. Then add the pasta sauce, some water, the pasta, and black beans. Turn the heat up to medium high and let it come to a boil. Lower the heat to Medium Low. Add salt for seasoning the pasta and squash, not too much, and pepper to taste. Stir well to make sure nothing is sticking — add water if it seems thick. There needs to be enough liquid to cook the pasta.

Cover the pan and allow it to simmer for 9 minutes. Stir it at least once. After 9 minutes, take it right off, stirring everything off the bottom.

Serve with a drizzle of oil and the basil on top, plus the grated cheese.

Of course, any shape of pasta will work, and any prepared sauce as well. If you don’t have/don’t like summer squash and black beans, then bell peppers, mushrooms or other vegetables that don’t take long to cook would work.

Definitely 2 Thumbs Up!

DIY Dunkin Donuts Breakfast Wrap

I have figured out a way to duplicate the DD breakfast wrap. I sometimes buy the bacon, egg and cheese wrap on my way to work and I really like it — it’s not too filling but it’s just enough for me. I’ve tried before to figure out how to make it at home, but it was messy and didn’t work well.

Then I found an appliance dedicated to making these wraps. Seriously! You can buy a machine for making breakfast burritos. And then you can buy a separate machine for making breakfast sandwiches, although you might as well splurge on the one that makes TWO breakfast sandwiches at once. LOL

You didn’t really think I was going to suggest getting one of those, did you? hahaha No, I have come up with a way to do this at home without buying anything you don’t already have. Here’s what you need for one wrap. You can even take this with you right in the foil:

  • One big square of foil
  • One tortilla, smallest size – I used white flour
  • One egg
  • One thin slice of cheese ~1/2 to 1 ounce
  • Bacon, pre-cooked — optional. I didn’t add this
  • Olive oil
  • Salt and pepper

You’ll need two burners on the stove. One is to scramble the egg and the other is to warm the tortilla right on the foil. Make sure the burner you use for the tortilla is very clean if you plan to wrap it up in the foil and take it with you.

Heat a small pan — I use a well-seasoned cast iron one — on medium heat. Add enough olive oil* to generously coat the bottom of the pan. Warm up the other burner to medium as well.

Place the tortilla on the foil, and take a basting brush and dip it into the oil from the heating pan and brush both sides of the tortilla. Be sure there is still enough oil in the pan to cover the bottom — you’ll be cooking the egg in that. Put the foil and tortilla on the hot burner — might need to turn this down to keep the tortilla from burning. Foil conducts heat really fast! Turn the tortilla over and heat the other side as well.

While that’s heating, crack the egg into a bowl and break it up with a fork. Add salt and pepper. When the olive oil is starting to smoke, tip the egg in and stir it a bit with a spatula. It will cook immediately, so when it does, take it right off the burner. Your tortilla should be hot by now, even browned in spots, on both sides. Place the cheese on half the tortilla (you’re going to fold it over), then add the egg on top of the cheese– and bacon if you’re using it.

Take the foil off the burner and fold it over in half (carefully – it’s hot!), pulling the tortilla away from the foil if it is a bit stuck. Turn it over on the other side, press down a bit to squish it together, pull the tortilla away on this side if it’s stuck. You can now put it on a plate, or wrap it up in the foil and take it with you!

*Scrambling eggs in hot olive oil is my new favorite way to do them. I learned it from America’s Test Kitchen/Cook’s Country/Milk Street. [Here]is the method explained. If you want this done quick and aren’t too concerned about over-cooking, you can heat that burner to medium high, but if you follow their method, it really makes a nice scrambled egg.

Food Experiments: Pasta w/Tomatoes in one Pan

I love to cook — now and then. Not always that excited to cook every day — who is? But when I get inspired, I really enjoy it. What I truly do not enjoy is shopping. I put off grocery shopping frequently until I don’t have anything I want to eat. And then sometimes I put it off a little longer. LOL

Sure, I know the right way to do things is to plan ahead, decide what you’re going to have for meals and then go shopping. Well, it’s not likely after 40 years cooking meals that I’m going to start doing that, so there are a lot of days when I have to get creative.

I recently discovered a great YouTube channel called Brothers Green Eats and it has inspired me to be more creative and less attached to recipes in the kitchen. These guys are very casual and fun and they have great ideas, great techniques to offer. Most of the food they make is very budget conscious, and one of the brothers, Josh, did a series called “How to Live on $3 a Day” which I really enjoyed. Be aware they can get a bit crude now and then. 🙂

Brothers Green Eats: How to Live on $3 a Day

The Recipe

Today I needed something for lunch. I had pasta, some leftover diced tomatoes from a can, onions, garlic and herbs and Parmesan cheese. I wanted to use just one pan, so I decided to cook them all at the same time. Here’s what I used for ingredients — measurements are approximate:

  • 3/4 cup rotini pasta
  • 2/3 cup diced tomatoes with juice
  • 1/4 cup diced onions
  • 1/2 garlic clove chopped fine
  • salt and pepper to taste and a pinch of sugar
  • 1 T butter
  • herbs — oregano and basil as you like
  • grated cheese

I brought about an inch or so of water to a boil, throwing all the ingredients except cheese in as I got them ready, with the pasta going in last when the water came to a boil. I let it cook on medium high for 9 or 10 minutes and then scooped out all the pasta and veg. Then the sauce got a bit of olive oil in it and stayed on the heat for 5 or 10 minutes to reduce. I threw the pasta/veg back in the pot with some of the cheese to combine, then plated it and added more grated cheese.

The Verdict? A Qualified Thumbs Up

So how’d it come out? Like soup! I couldn’t get the sauce to reduce very much, so I just put everything in a bowl. It was very tasty. The grated cheese did not work well though because the hot liquid made it gum up. If the sauce were much thicker the cheese would have been fine. I wouldn’t add it until after plating the pasta though.

Next time I think I would separate the pasta from the vegetables as they cooked, maybe putting the veg in a steamer basket and the pasta in the bottom of the pan. Then when the pasta is done, it could come out and the rest could continue to cook down for 5 or 10 minutes. The other thing I might do is combine a bit of the liquid with some corn starch and then add it back in the sauce.

All in all, I would do it again. Could certainly add some frozen meatballs or sausage or chicken. The main thing is to use very little water – just about enough to cover the pasta and veggies. It will still be enough to cook the pasta and you don’t lose any flavors by draining the pasta.

Next food experiment: I want to make tomato rice, where you make a big pot of rice and cook a whole tomato on top of it. But I’ll have to go buy a tomato for that. 🙂

Downy Infusions: Why?

Just saw a commercial for a Downy product – touch activated long lasting scent fabric conditioner (Ultra Downy Infusions). This sounds like such a terrible idea to me.

To begin with, I certainly don’t get why you would want MORE fragrance in your clothes than you already get with normal detergents and/or fabric softeners/dryer sheets. Sure, maybe you like the scents they offer or whatever. But to use a product that leaves so much residue on your clothes that touching the material releases the fragrance into the air? That just seems to be a terrible idea. Cloth that you wear next to your skin infused with chemicals, releasing those chemicals so you can breathe them all day long. I think it’s a little alarming.

I do not know anything about the toxicity of these products — apparently it’s difficult to get any kind of complete information about it because of trade secrets. But I don’t think I need to know the composition to be concerned about the addition of long-lasting chemicals onto your skin and into your lungs.

But also, just the fact that you’d want more fragrance in your laundry — what is that about? Is this for people who continually let their laundry sit in the washer and get smelly? Because there’s a solution for that that doesn’t cost money…

I was equally perplexed when they came out with “Unstopables”. The product doesn’t do anything but add more fragrance to your laundry as far as I can determine. Not to mention, why would you market a product with an inexplicable misspelling in the name? Usually brand name misspellings are to take advantage of a pun. I see no pun here, unless we are supposed to notice that there is less P in it. LOL

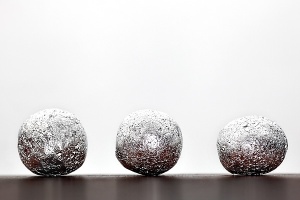
Maybe I’ll go back to foil balls in the dryer to prevent static cling and give up using dryer foil1sheets. I have tried it before and it does quite well. Better living through physics! The great thing is after they’ve been through a few cycles, they become shiny smooth little balls!
Adding a bit of white vinegar to the rinse water reportedly does a good job softening and eliminating soap residue. I have used vinegar to get rid of odors many times in the laundry rinse, so I know that works, but if you like some fragrance in your laundry, you can try a few drops of your favorite essential oil in with the vinegar.

I’d love to hear about your experiences with these products, pro or con.


Photo from greenideareviews.com

Cutting Veggies on the Bias

I was watching a cooking show on PBS today and the host was cutting celery and scallions for a salad. She wanted them cut on the bias, and the way she did it was so awkward looking and slow. It just made no sense to do it that way, so I thought I would try doing a video showing how I do it.

It was quite a trick to video using my little crummy phone, especially to get a view looking down on the cutting board. I ended up hanging it from the handle of a cupboard door. LOL So it’s not great, but you get the idea anyway…I think.


Thoughts on Shredding

I got to thinking about shredding today because I need to clean up a lot of paperwork and old mail and I wondered if I really need to shred anything with my name and address on it. I usually do this with everything that goes into the recycling or trash.

I shred any paperwork with identifiable information on it: medical, financial, school or employment related stuff with my name or address on it. But I also rip the address section off of catalogs, magazines, and junk mail and shred that. That’s an awful lot of fussing around with stuff you really just want to throw out, so I decided to look online to see what is recommended.

All of the security type sites encourage people to shred anything at all with their name and address on it. Other sites where people are just discussing it are more varied. A lot of people question the purpose of this caution, and what I gleaned from this is that it makes a difference what someone could learn from what you are throwing out. Knowing that you get an L.L.Bean catalog or subscribe to a news magazine probably isn’t of any use to anyone. However, knowing that you went (or go) to a particular high school or college actually does help to identify you. So does knowing where you work, and of course who your relatives and friends are.

My conclusion is that I will shred anything that really says something about me. If it is an affiliation like schools, employers or groups I’m a member of, I’ll still be removing my name and address and shredding that. For junk mail that everyone gets that says nothing identifiable about me, I think that can just go in the bin intact. And catalogs and magazines that don’t identify my school/work affiliations can also go without shredding. Of course I’ll still be shredding the obvious things like financial and medical documents, and cutting up old credit cards etc. Also any credit card offers in the mail. One thing I was reminded of when I researched this is to shred your signature on anything too.

What do you think? Am I being overly cautious or not cautious enough?

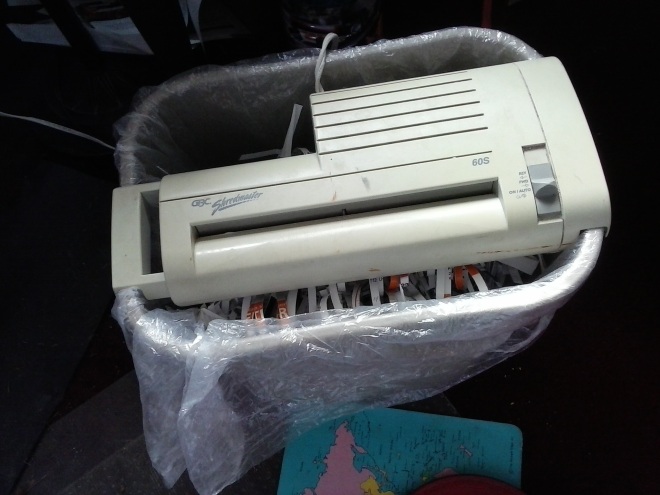
My ancient decrepit shredder

My very old, very simple shredder

My old strip shredder is probably sufficient for me because I bag up and deliver my shredded paper directly to the Zero-Sort recycling bin at my local transfer station. I think if it went in the garbage or a bin for pickup at your home, a cross-cut shredder would be more secure. To further confuse the issue, recycled shredded paper is less valuable the smaller the pieces. But that’s just another reason not to shred everything (and certainly an argument for composting shredded paper)

Cure for the Alcohol Hiccups!

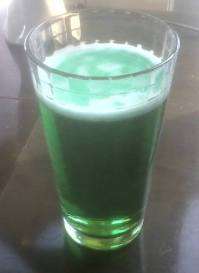
So annoying, so embarrassing — when you’ve had a beer or two and suddenly start hiccuping, it really puts a damper on your night, right? Well, Eureka! I’Too much green beer?ve discovered a cure!

Take a slice of white bread — preferably something substantial such as French bread, or deli toasting bread. Slather it with butter. Then sprinkle a spoonful of sugar over the bread nice and evenly. Now sit down and relax and eat it. Have some water with it.

Seriously, cured my hiccups immediately. I hope it works for you. 🙂

I have to give credit to my childhood friend Carolyn A. — not that she ever had beer hiccups, but when I would go over to her house after school, we would always make these for a snack. I thought it was quite exotic because my mother would never have let me have such a thing.

Tomato Yoghurt Dressing

Quick and easy dressing for sandwiches or greens

I had some leftover crushed tomatoes and needed a thick dressing for a sandwich. This was really tasty, so I thought I’d share.

Olive Oil
Salt and Pepper (to taste)
Crushed Tomatoes (canned)
Plain Yoghurt

In a small bowl or cup, mix a tablespoon of oil with salt and pepper using a fork. Go easy on the salt as there is some in the tomatoes. Add 2 tablespoons crushed tomatoes and 1 tablespoon yoghurt. Mix well with fork. Adjust seasoning if needed.

Makes enough for a couple of sandwiches or salads.